Once you have setup Download Magnet it’s time to add our first file.
Main File Details #
Enter Download Name – This is a name used to identify internally, like a post slug. It is not used publicly.
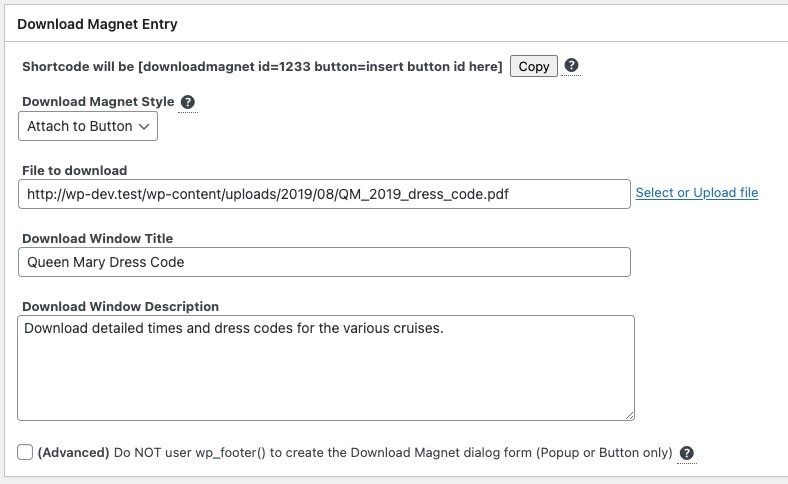
Shortcut will be – This is the shortcode that you use on the page you want the lead magnet. This will show a Download button.
Download Magnet Style –
- Popup: Will place a button and users will click that for a popup to enter their details.
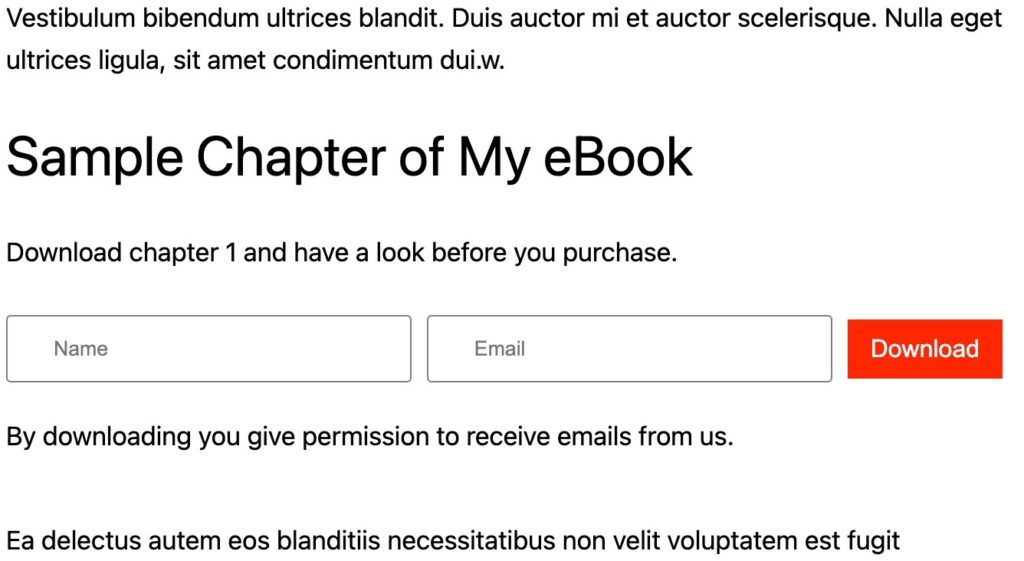
- Inline: Will place the form inline with the page, see below for an example.
- Attach to Button: (New in Version 2): Will allow you to attach the Download Magnet dialog box to an existing button (or element) in your design.
File to Download – You can either select a file from your WordPress media library or upload a new one.
Download Window Title – This will appear as the main title in the download pop up window.
Download Window Description – You can write a longer text piece that offers the downloader more information.
Do not use wp_footer() – (New in Version 2) – Most of the time this can be left unchecked. Download Magnet now places the code for the dialog box in the wp_footer hook. Most themes add this as part of their design, however there may be times that the wp_footer hook was not added and is not available. If you find the dialog box does not show when testing, check this option and the dialog code is inserted at the point of the shortcode on the page design.
Pop Up Dialog Example #

Inline Form Example #
Download Options #
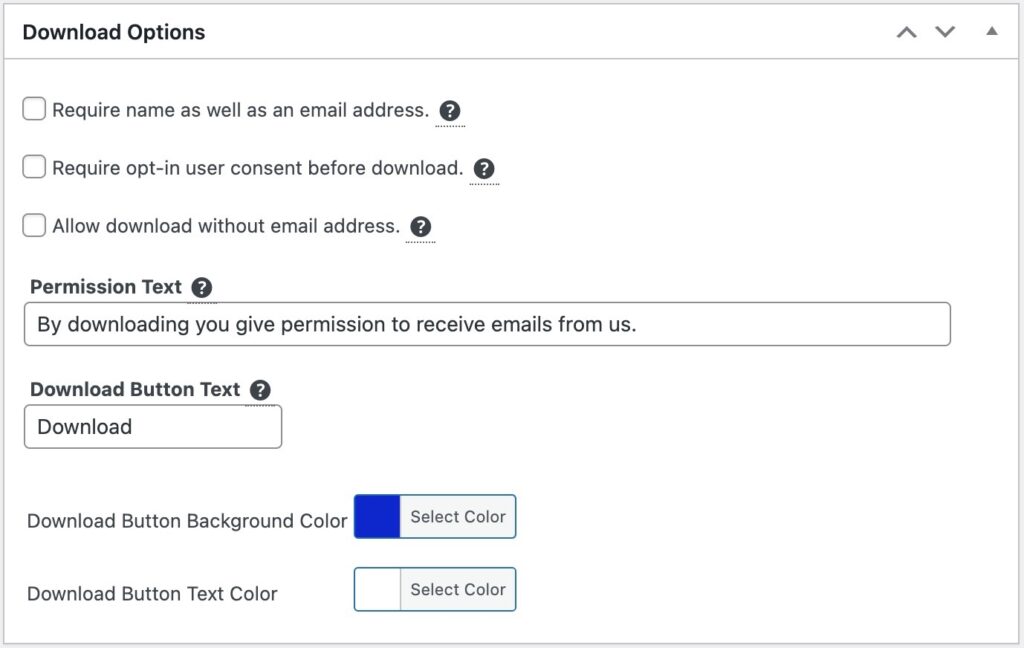
Require name as well as an email address – This will show a name field, and will be required if selected.
Require opt-in user consent before download – Some countries/regions/territories such as the EU’s GDPR law etc. require an explicit opt-in from the user to capture an email address. Selecting this will show a checkbox that must be clicked by the user before a download can happen.
Allow download with email address – This will show a download link at the bottom of the dialog allowing the user to download the file without offering an email address.
Permission Text – This can be customized but will always show on the pop up dialog.
Download Button Text – Replace the default “Download” text with whatever you want or language.
Download Button Background/Text Color – These can change the default button colors. (More customization will appear later in newer versions).
Email Addons – Any addons purchased to automatically send the collected email address to leading providers will show up at the bottom of the page.
To add the Download Magnet button to a page, follow these instructions or if attaching to an existing button, follow these guidelines.